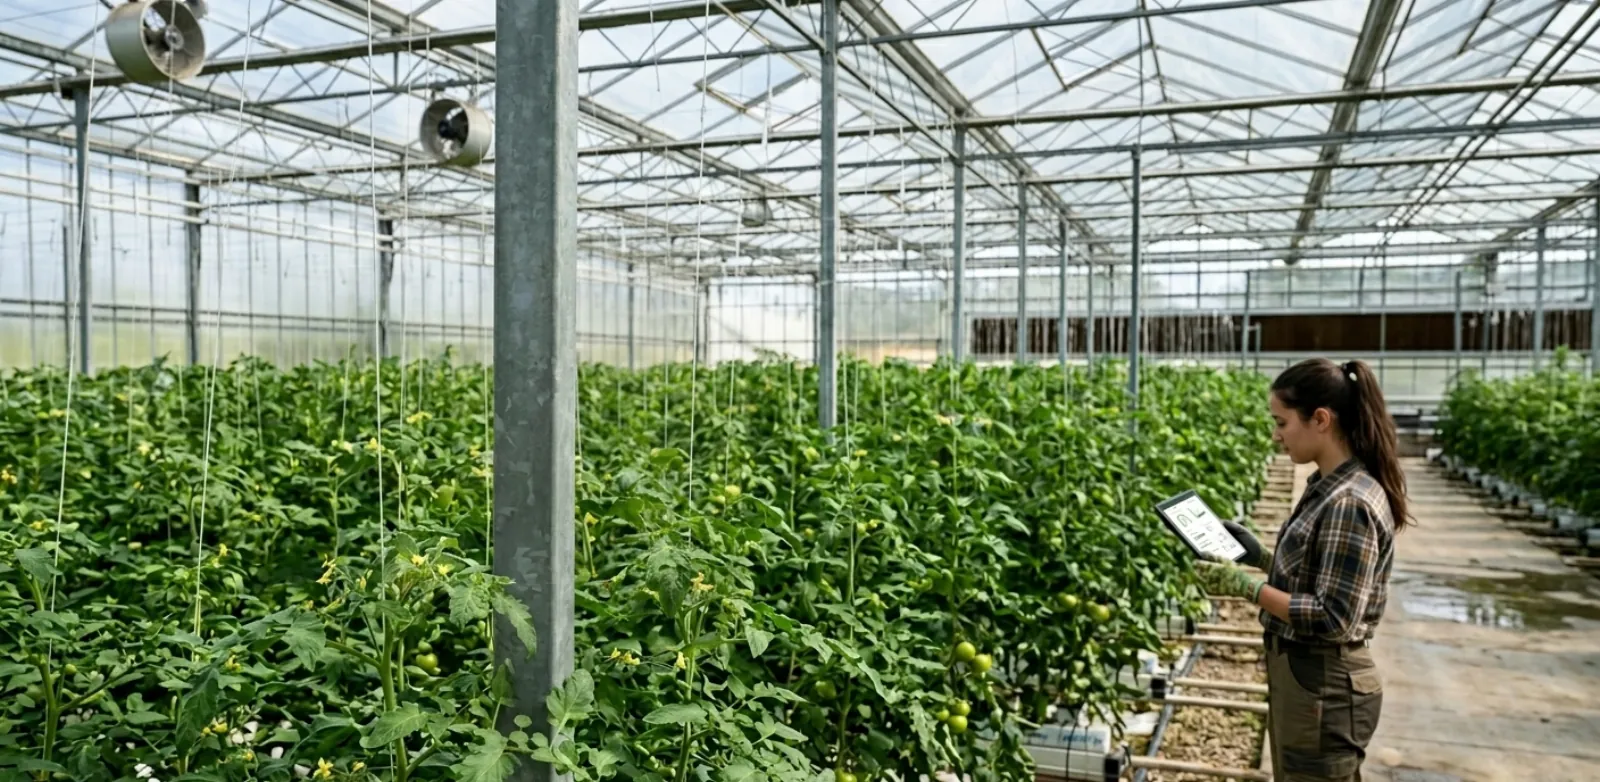
Temperature is one of the most critical parameters in crop production. Every crop demands a specific temperature range for optimal growth: tomatoes need 18°C to 26°C during the day and 14°C to 18°C at night, cucumbers prefer 22°C to 28°C, and cool-season ornamentals like cyclamen require 10°C to 16°C. A deviation of just a few degrees from the target range can hurt flowering, slow ripening, or cause irreversible tissue damage.
Greenhouses enable year-round production by creating a controlled environment, but they demand active temperature management. In warm seasons, solar radiation heats the greenhouse far beyond the desired temperature. On winter nights, heat escapes through the cover and the ground, and the plants are exposed to cold injury. Without precise control, the greenhouse grower is in a constant race against the weather.
This is where IoT (Internet of Things) technology comes in. Smart IoT-based temperature control replaces slow human reaction with fast, precise automation. Digital sensors measure temperature and humidity in real time, a smart controller processes the data and operates heating, ventilation and shading equipment, and the whole system can be monitored and controlled remotely from a smartphone or computer. The result: healthier crops, less wasted energy, and peace of mind for the grower.
In this guide we cover the main challenges of greenhouse temperature management, the different control methods, why IoT-based automation outperforms manual control, and a step-by-step walkthrough of installing a smart temperature control system in your greenhouse.
Temperature challenges in greenhouses
Managing greenhouse temperature is a far more complex challenge than it appears at first glance. These are the main factors that make it hard to hold a uniform, stable temperature.
Solar radiation and summer heat buildup
A greenhouse acts as a natural heat trap. Solar radiation penetrates the transparent cover, heats the soil and the plants, and the re-radiated heat cannot escape. On summer days, the temperature inside a closed greenhouse can reach 50°C and above within a few hours, far beyond the survival range of most crops. Temperature control during the summer months requires active cooling mechanisms that engage quickly.
Heat loss on winter nights
On cold nights the situation reverses. Polyethylene or glass covers insulate poorly, and heat escapes fast. Night temperatures can drop below freezing, and without active heating the crops suffer damage. The difference between day and night temperatures can reach 30 degrees or more, and the heating system has to respond accordingly.
Temperature gradients inside the greenhouse
Greenhouse temperature is not uniform. Areas close to the cover run hotter than the crop zone. Corners and shaded areas run colder than the center. Proximity to vents or doors creates pockets of cold air. Gradients of 3°C to 5°C inside the same greenhouse are common, and without multiple sensors there is no way to detect them.
The interaction between temperature and humidity
Temperature and relative humidity are tightly linked. When temperature falls, relative humidity rises, and vice versa. Humidity above 85% creates an ideal environment for fungal diseases such as gray mold (Botrytis) and powdery mildew. Temperature control has to account for its effect on humidity, and sometimes you need to heat specifically to bring humidity down, even when the temperature itself is inside the target range.
Rapid weather changes
Sudden cloud cover can drop the temperature by several degrees within minutes. Sun breaking through after an overcast day heats the greenhouse rapidly. Strong winds accelerate heat loss. These changes demand a fast response that a person cannot always provide, and certainly not 24 hours a day.
Energy costs
Heating is one of the largest operating expenses in many greenhouse operations, whether it runs on gas, diesel or electricity. Without precise temperature control, energy is wasted on unnecessary heating or excessive cooling.
Different requirements at different growth stages
A single crop needs different temperatures across its life cycle. Tomatoes, for example, need higher temperatures during germination, moderate temperatures during vegetative growth, and a deliberate day-night difference (DIF) during flowering. A smart control system has to support switching temperature profiles as the crop advances through its stages.
Temperature control methods for greenhouses
There are several core methods for controlling greenhouse temperature. In practice, most commercial greenhouses combine several of them.
Heating
Heating is essential in the shoulder seasons and in winter. The common methods include:
Hot water systems. Hot water piping runs along the crop rows or under the soil. This is the most effective method for even heat distribution. The water is heated in a central boiler (gas, diesel or electric), and pumps circulate it in a closed loop. Switching the pumps and boiler through relays enables full automation.
Hot air blowers. Suitable for small and medium greenhouses. They deliver fast heating but a less even distribution, and work well as a supplement to hot water systems. Operating them is simple: a single relay for on and off.
Radiant (infrared) heating. Panels that radiate heat directly onto the plants and the soil without heating the air. Energy-efficient in tall greenhouses, because the heat does not rise to the ceiling.
Heating runs mostly at night and in the early morning. In deep winter, heating may run during the day as well. The night target temperature is typically 4°C to 8°C below the day temperature, depending on the crop.
Ventilation and cooling
Ventilation is the primary tool for lowering temperature and removing excess humidity:
Natural ventilation. Opening roof and side vents drives natural airflow: hot air rises and exits through the roof vents while cooler air enters from the sides. It is effective down to roughly 5°C above the outside temperature. Electric vent motors can be switched through the control outputs of an IoT controller.
Forced ventilation. Exhaust fans at one end of the greenhouse and air inlets at the other (a pad-and-fan system). This creates uniform airflow and, combined with wet pads in dry conditions, can pull the temperature well below the outside air. Controlling fan staging through an IoT controller delivers high precision.
Evaporative cooling. Water evaporates from wet pads or fogging systems and absorbs heat from the air. Especially effective in dry climates. It combines temperature reduction with humidity increase.
Shading
Shade screens reduce the amount of radiation entering the greenhouse:
Internal screens. Deployed under the greenhouse roof. They cut incoming radiation by 30% to 70% depending on screen density. At night, they can be closed as an extra insulation layer that reduces heat loss. The deploy and retract motor is easily switched through an IoT controller.
External screens. Mounted above the cover, they stop the radiation from reaching it in the first place. They are more effective than internal screens for lowering temperature, but they contribute nothing to insulation.
Automated shading driven by a radiation sensor plus a temperature sensor is one of the simplest and most rewarding applications of smart temperature control.
Fogging and misting
Fogging systems spray tiny water droplets (5-50 microns) that evaporate in the air. They serve both to lower temperature and to raise humidity. For tropical crops such as orchids, fogging enables fine control of both parameters at once. The IoT controller runs the high-pressure pump in short cycles (for example 30 seconds on, 2 minutes off) based on the temperature and humidity sensor readings.
Why manual control is not enough
Many growers still rely on manual control: opening vents by hand, switching on a fan when it feels hot, firing up the heating when it feels cold. This approach may work in a small hobby greenhouse, but in commercial production it leads to serious problems.
Late response. By the time the grower notices a sharp temperature rise, walks into the greenhouse and starts the ventilation, the plants have already been exposed to damaging temperatures for 20-30 minutes or more. That is enough time for flower damage, fruit drop, or heat stress.
Inconsistency. Manual control depends on whoever is working that day. One worker opens the vents at 9 in the morning, another at 11. One switches off the heating when it feels warm, another forgets. There is no standard, no repeatability, and no way to know what actually happens to the temperature through the day.
No response at night or on weekends. Critical temperature problems happen precisely at night, when nobody is in the greenhouse. A sudden cold snap at 3 AM, a heater failure, a vent left open: any of these can wipe out an entire crop. On weekends and holidays the exposure gets worse.
No data for optimization. Without data logging, there is no way to know the minimum temperature last night, how long the heating ran, or whether temperatures are trending down. Without data, there is no learning and no improvement.
Wasted energy. Without automatic control, growers tend to set the heating high “just in case” and leave fans running for hours beyond what is needed. The result is an energy bill inflated well above what the crop actually requires. Precise temperature control eliminates that waste.
An IoT temperature control system for greenhouses
An IoT temperature control system for a greenhouse is built from four main components working together: sensors, a controller, actuators, and a cloud platform.
Sensors
The sensors are the eyes of the system. Effective greenhouse temperature control needs several types:
- Air temperature and humidity. The SHT30 sensor measures temperature and relative humidity in a single unit, with ±0.3°C accuracy for temperature and ±2% RH for humidity. Installing 2-4 sensors at different points in the greenhouse is recommended. For longer cable runs over an RS485 bus, the THS-100 is the industrial Modbus option.
- Soil temperature. The DS18B20 sensor is waterproof (IP68), and multiple sensors can be daisy-chained on a single cable. Essential for monitoring root-zone temperature and timing transplanting.
- Solar radiation. A PAR sensor or pyranometer to determine when to deploy shading.
- Outside temperature. A sensor outside the greenhouse lets the controller account for external conditions and respond ahead of expected changes.
Controller
The controller is the brain of the system. The Omni Genesis is an IoT controller designed specifically for agricultural environments, with the features that matter for greenhouse temperature control:
- Control outputs for switching fans, pumps, vent motors and heating systems.
- Multiple sensor inputs with support for I2C, 1-Wire, analog and Modbus RS-485.
- Local control logic. The system keeps operating even without an internet connection; control decisions are made on the controller itself.
- Communication. WiFi and cellular (4G) connectivity for sending data to the cloud and receiving remote commands.
Actuators
The actuators are the hands of the system, the equipment that carries out the control actions:
- Exhaust fans and air circulation fans
- Roof and side vent motors
- Shade screen deployment motors
- Heating systems (boiler, pumps, blowers)
- Fogging and high-pressure pumps
- Thermal insulation screens
Each one connects to a control output on the controller and operates according to the control logic.
Cloud platform
The cloud provides the monitoring, remote control, and data analysis layer:
- Dashboard. A real-time view of every parameter: temperature, humidity, actuator states.
- Alerts. Notifications to your phone when temperature drifts outside the configured limits.
- Historical data. Charts and tables for trend analysis and optimization.
- Remote control. Change settings, operate equipment manually, and update schedules from anywhere.
Control logic
A typical greenhouse control logic layer includes:
- Schedules. Different target temperatures for day, night, and transition hours (sunset and sunrise).
- Sensor-based triggers. Start ventilation when the temperature rises above a threshold, start heating when it drops below one.
- Hysteresis. Prevents rapid cycling. For example: heating switches on at 16°C and only switches off at 18°C, not at 16.1°C.
- Priorities. If both temperature and humidity are high, the system prioritizes ventilation over fogging.
The advantages of an IoT system over manual control are clear: accuracy within a degree, automatic response instead of waiting for a person, continuous 24/7 operation, data for ongoing optimization, and remote access from anywhere. Learn more about Agrinovo temperature monitoring solutions and temperature control solutions.
Energy savings
One of the most significant aspects of smart temperature control is energy savings. Heating and cooling dominate the operating costs of a climate-controlled greenhouse, and an IoT system attacks that waste directly.
Night setback
Setting a lower target temperature for the night, for example 14°C instead of 18°C, saves a significant share of heating energy. Most crops adapt well to a day-night difference (DIF) and even develop sturdier stems. The IoT controller manages the transition between day and night temperatures smoothly, without abrupt jumps.
Dead-band
A dead-band is the gap between the heating trigger point and the cooling trigger point. For example: heat below 16°C, cool above 24°C, and between 16°C and 24°C nothing runs. Without a dead-band, absurd situations of simultaneous heating and cooling become possible, and energy is burned for nothing.
Weather-based anticipation
An outside temperature sensor lets the controller anticipate changes. If the outside temperature is falling fast, the controller starts heating before the inside temperature crosses the threshold, which prevents a sharp temperature drop and reduces the heating load.
Zone control
Large greenhouses can divide the area into separate control zones, each with its own sensors and actuators. A shaded northern zone gets more heating; a bright southern zone starts cooling earlier. Zone control avoids heating or cooling areas that do not need it.
Data analysis for optimization
The historical data collected by the IoT system enables analysis that exposes saving opportunities. The analysis may reveal that the heating runs an unnecessary hour after sunrise, that the fans start too early, or that the shade screen closes too late. Correcting these findings compounds into further savings on top of the automation itself.
What growers see in the field
Greenhouse growers who move from manual control or a simple thermostat to IoT temperature control consistently find the same pattern: the data exposes heating hours nobody knew about, cooling that fought the heating, and equipment running long past the point of need. In a greenhouse where heating is a major annual expense, eliminating that waste compounds over a season. The scale of the system (sensors, controller and actuators) is matched to the size of the greenhouse. For a configuration suited to your operation, contact us.
Step-by-step installation guide
Step 1: Map the temperature zones in your greenhouse
Before installing equipment, you need to understand the thermal behavior of your specific greenhouse. Run an initial survey:
- Identify hot and cold zones. Place simple thermometers at different points: the center of the greenhouse, the corners, near doors, near vents, at crop height and near the ceiling. Record readings at different hours of the day and night.
- Mark air entry points. Vents, doors, gaps. These are the places where outside temperature penetrates and creates gradients.
- Identify shaded areas. Areas that receive less radiation (the north side, under structural beams) will run colder during the day but not necessarily warmer at night.
This mapping determines the sensor placement and helps plan the actuator layout.
Step 2: Install temperature and humidity sensors
Based on the mapping, install SHT30 sensors at representative points:
- At crop height. This is the most critical point. The sensor has to measure the temperature the plants experience, not the ceiling temperature.
- At least two sensors. One at each end of the greenhouse. In a large greenhouse, 3 to 4 sensors.
- An outside sensor. Install a sensor outside the greenhouse, protected from direct radiation, to measure outside temperature.
- Soil sensors. Add DS18B20 sensors at 10 and 20 cm depth in the root zone.
Protect the sensors from direct radiation with a radiation shield to get accurate readings.
Step 3: Connect actuators to the IoT controller
Wire all the equipment to the control outputs of the Omni Genesis controller:
- Fans. A separate output for each fan or fan group.
- Heating system. One output for the boiler or burner and one for the circulation pump.
- Vent motors. An output for open and an output for close (or a paired output for a bidirectional motor).
- Shade screen. An output for deploy and an output for retract.
- Fogging. An output for the high-pressure pump.
Verify that the wiring is rated for the electrical load of each actuator. For high-draw equipment (above 10A), use an intermediate contactor driven by the control output.
Step 4: Configure control logic and schedules
Program the controller with temperature control settings matched to your crop:
- Target temperatures. Set a day temperature (for example 22°C) and a night temperature (for example 16°C).
- Hysteresis. Set a gap of 1°C-2°C to prevent rapid cycling (for example: heating ON at 15°C, OFF at 17°C).
- Schedules. Define the transition hours between day and night mode, or use a radiation sensor for automatic switching.
- Seasonal scenarios. Build separate profiles for summer, winter and the shoulder seasons, and switch between them by date or by actual conditions.
- Alerts. Set an upper threshold (for example 35°C) and a lower threshold (for example 8°C) that trigger notifications to the grower.
Step 5: Monitor, analyze, and optimize
After installation, the system starts accumulating data. This is where smart temperature control proves itself:
- Follow the charts. Review the temperature and humidity charts on the dashboard. Look for anomalies, unexplained spikes, and periods where the system works harder than it should.
- Identify patterns. Maybe the temperature always climbs too fast at 10 AM? Maybe the heating runs without justification between 8 and 9? These patterns expose improvement opportunities.
- Tune the settings. Adjust target temperatures, refine hysteresis, change schedules. Every small change can improve performance and efficiency.
- Correlate with crop results. The connection between the temperature data and yield quality, growth rate and plant health is the information that turns a good grower into an excellent one.
For a deeper look at control systems, read the temperature control systems guide.
From reactive to automated
Smart greenhouse temperature control is not a luxury, it is a business necessity. The difference between an automated IoT system and manual control shows up as higher crop quality, fewer crop losses, meaningfully lower energy waste, and the peace of mind that lets the grower focus on growing instead of firefighting.
A core system of temperature and humidity sensors, an Omni Genesis controller with control outputs, and a cloud platform gives you the ability to monitor the greenhouse from anywhere, receive immediate alerts, and accumulate the data that sharpens your decisions season after season. That is what separates smart agriculture from traditional agriculture.
If you manage a greenhouse and want to upgrade your temperature control, contact us for advice matched to your needs. We will help you choose the right sensors, controller and actuators, and design a system that fits your greenhouse and your crops exactly.