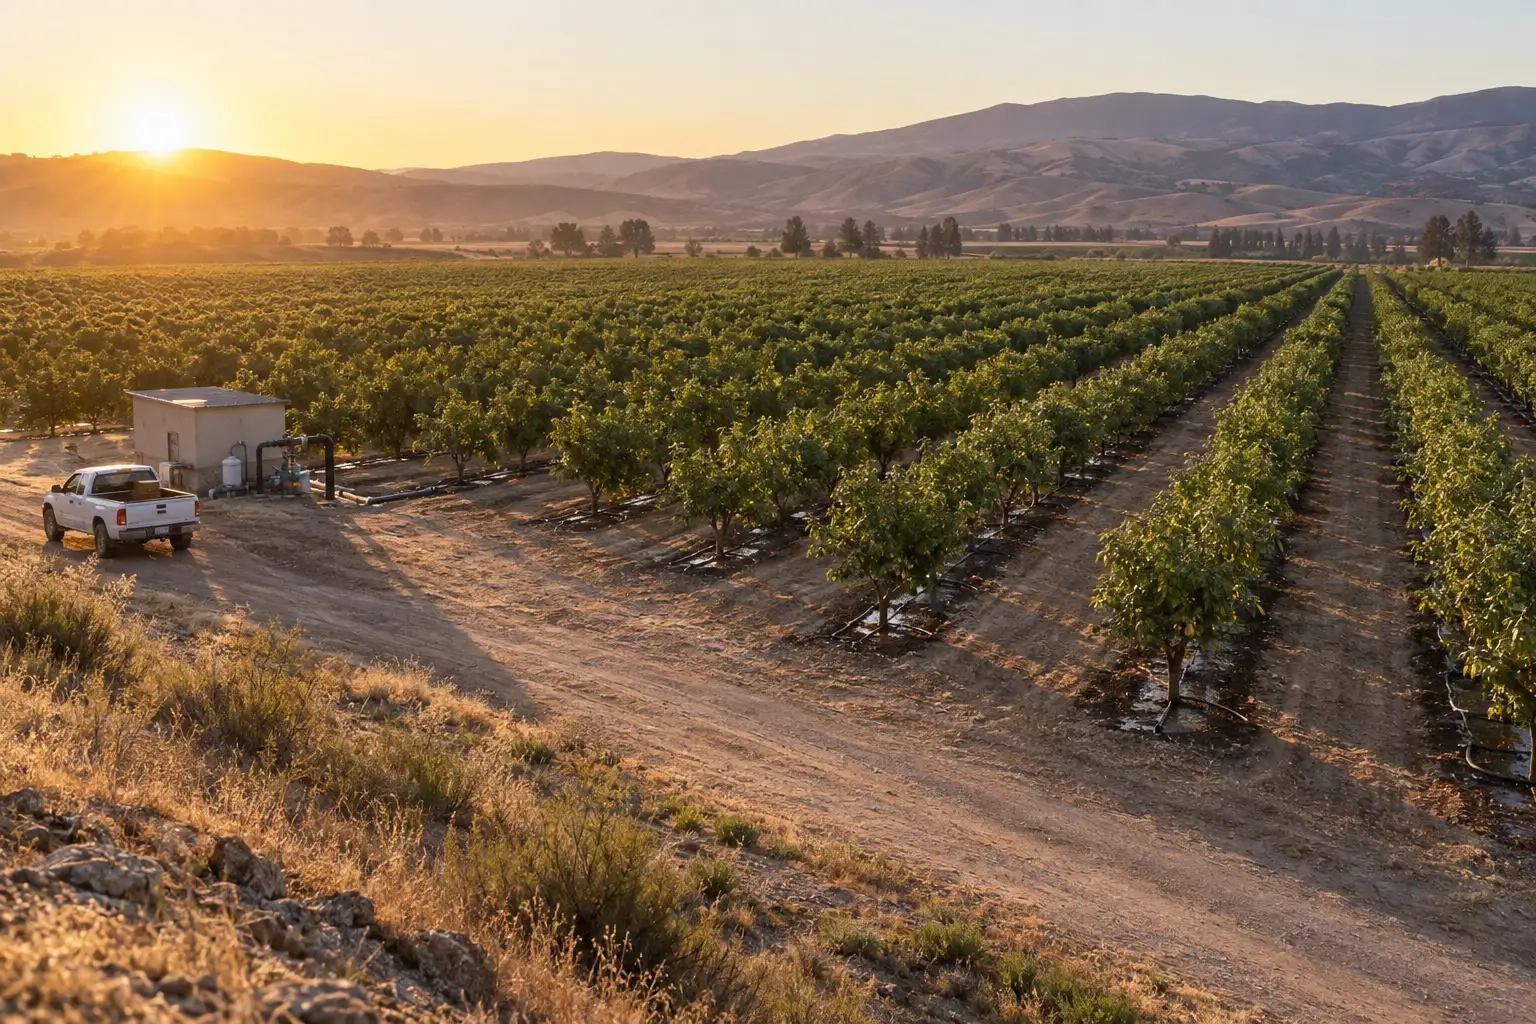
Two years ago, I helped a citrus grower in the Central Valley set up his first IoT soil monitoring system. He’d been irrigating on a fixed schedule - same amount, same time, every field. Within three weeks of seeing actual soil moisture data, he cut water use by 35% and his trees looked better than they had in years. The data showed half his fields were chronically overwatered while the other half were consistently underwatered.
That’s what a proper IoT soil monitoring system does. It replaces guesswork with data. But choosing the right components - sensors, controllers, connectivity, and cloud platform - can feel overwhelming when you’re starting from scratch.
If you would rather start from a complete setup, our IoT soil monitoring system brings the sensors, the controller and the cloud dashboard together.
This guide walks you through exactly how to build a soil monitoring system for your farm, based on what I’ve learned deploying these systems across dozens of operations over the past seven years.
How to Use Sensors for Soil Monitoring: Step-by-Step
The process works the same whether you’re monitoring a 2-acre vegetable plot or a 2,000-acre orchard. Five steps:
Step 1. Pick the right sensors for what you need to measure
Start with soil moisture (the highest-ROI parameter). Add temperature if germination or root activity matters. Add EC if you fertigate or face salinity. Add pH for crops with narrow pH ranges. Most farms start with moisture and temperature, then add sensors as the data shows gaps.
Step 2. Install sensors at multiple depths in the root zone
Place one sensor at 15 cm (irrigation timing), one at 30 cm (confirms water is reaching roots), and one at 60 cm (catches over-irrigation). For orchards and vines, add a 90-120 cm sensor. Locate stations in representative field zones, not the easiest spot to access.
Step 3. Wire sensors into a field-ready IoT controller
The controller reads your sensors and transmits data. It must support the right protocols (SDI-12, RS-485 Modbus, 1-Wire, or analog) and survive field conditions: IP65 or better, -20°C to 60°C operating range, solar + battery power. The Omni Genesis controller accepts all of these protocols on the same unit, which matters because every operation I’ve deployed has added sensors within the first year.
Step 4. Connect the controller to a cloud platform
Cellular (4G/LTE) is the proven default and suits remote sites that need real-time alerts. Wi-Fi only works near buildings. The controller publishes sensor readings to a cloud platform, where you can visualize trends, set thresholds, and receive alerts. Modular controllers can also be LoRaWAN-ready, a long-range option for large farms without cellular coverage where one gateway covers 2-10 km.
Step 5. Read the data and act on it
Set threshold alerts so you’re notified when moisture drops, EC spikes, or pH drifts. Review historical trends weekly to spot patterns. Over time, automate irrigation triggers from moisture thresholds. Most farms cut water use 20-40% within the first season by replacing fixed schedules with data-driven decisions.
The rest of this guide goes deeper into each step: which sensors to pick for your crop, how the controller works, what to look for in a cloud platform, and how to size the system for your acreage.
What Is an IoT Soil Monitoring System?
An IoT soil monitoring system is a connected network of in-field sensors that continuously measure soil conditions and transmit data wirelessly to a cloud platform. Instead of walking fields with a handheld probe or waiting weeks for lab results, you get real-time soil data on your phone or computer.
A complete system has four components:
- In-field sensors - measuring moisture, temperature, EC (conductivity), pH, and soil tension at multiple depths
- IoT controller - the field hub that reads sensor data and transmits it wirelessly
- Connectivity - cellular 4G/LTE (the proven default), Wi-Fi, or a modular LoRaWAN-ready option to move data from field to cloud
- Cloud platform - dashboard for visualization, alerts, historical trending, and automation triggers
When these four pieces work together, you get a precision agriculture platform that monitors your soil 24/7, alerts you to problems before they damage crops, and gives you the data foundation for smarter irrigation and fertilization decisions.
Choosing the Right Soil Sensors
The sensors you need depend on what you’re growing and what problems you’re trying to solve. Here’s a breakdown of each sensor type and when it matters.
Soil Moisture Sensors
This is where most growers start, and for good reason - water management drives most of the ROI.
There are two approaches to soil moisture measurement:
Volumetric water content (VWC) sensors tell you what percentage of soil volume is water. They’re straightforward to interpret and work well for automated irrigation triggers.
Soil water tension sensors (tensiometers and granular matrix sensors) measure how hard plants have to work to extract water. This is often more useful than raw moisture percentage because it accounts for soil type automatically - a tension reading of 30 centibars means the same thing whether you’re in sandy loam or heavy clay.
For most precision agriculture operations, I recommend tension-based sensors:
- SR Tensiometers for shallow root zones (vegetables, turfgrass) at 15-30 cm depth
- MLT Tensiometers for mid-depth monitoring (orchards, vineyards) at 45-60 cm
- Watermark 200SS granular matrix sensors for maintenance-free, long-term monitoring with 5+ year lifespan
For a deeper dive into how these sensor types compare, see our complete guide to soil sensors for precision agriculture. To learn more about these technologies, see our tensiometers for irrigation guide and granular matrix sensors guide.
Soil Temperature Sensors
Soil temperature affects germination timing, root activity, nutrient uptake rates, and microbial activity. It’s the most underrated parameter in precision agriculture.
The DS18B20 digital temperature sensor is the industry workhorse - accurate to ±0.5°C, waterproof (IP68), and low cost. You can chain multiple probes on a single wire to monitor several depths simultaneously.
I install temperature probes at 6” and 12” depths alongside moisture sensors. For above-ground environmental conditions, the SHT30 temperature and humidity sensor complements soil probes by tracking air temperature and humidity, which directly influence evapotranspiration rates and irrigation needs. The correlation between soil temperature and irrigation efficiency is significant - cold soils absorb water differently, and knowing soil temperature helps you time plantings and predict nutrient availability.
EC (Electrical Conductivity) Sensors
EC is your real-time window into soil nutrient levels and salinity. When you apply fertilizer, EC rises. When plants absorb nutrients or rain leaches them, EC drops. Tracking these patterns tells you whether your fertilization program is working or wasting money.
Key EC thresholds for agriculture:
- 0-0.8 dS/m: Low nutrients, likely needs fertilizer
- 0.8-2.0 dS/m: Healthy range for most crops
- 2.0-4.0 dS/m: Moderate salinity, sensitive crops struggle
- 4.0+ dS/m: Problem zone, intervention needed
EC sensors are essential if you’re fertigating (applying fertilizer through irrigation) or farming in areas with salinity concerns.
pH Sensors
Soil pH controls nutrient availability. You can have abundant nutrients in your soil, but if pH is outside the optimal range (typically 5.5-7.0 for most crops), plants can’t access them.
In-field pH monitoring is most valuable for:
- High-value crops with narrow pH requirements (blueberries, cannabis)
- Fields with known pH drift
- Operations using acidifying or alkaline fertilizers
- Soils affected by irrigation water quality
Ion-Selective Sensors for Nutrient Monitoring
For growers who need more precision than EC provides, ion-selective sensors can measure specific nutrient ions directly - nitrate (NO3-), potassium (K+), calcium (Ca2+), and others. They’re more expensive than general EC sensors but give you targeted nutrient data without lab delays.
The IoT Controller: Your Field Hub
The controller is the brain of your soil monitoring system. It reads all your sensors, processes the data, and transmits it to the cloud.
Here’s what to look for in an agricultural IoT controller:
Multi-Protocol Sensor Support
Your controller needs to speak the same language as your sensors. Different sensor types use different communication protocols:
- Analog (0-5V, 4-20mA): Older soil sensors and many industrial probes
- 1-Wire: Temperature probes like the DS18B20
- SDI-12: Professional soil moisture and weather sensors
- RS-485/Modbus RTU: Industrial-grade equipment
- I²C: Compact digital sensors
A controller with multi-protocol support - like the Omni Genesis - lets you mix sensor types and add new sensors over time without replacing hardware. This flexibility matters more than you think. Every operation I’ve worked with has added sensors within the first year.
For a detailed breakdown of which protocol to use for which sensor type, see our sensor protocols guide.
Connectivity Options
Your controller needs to reliably transmit data from field to cloud. The main options:
4G/LTE is the proven default for field deployments. It provides real-time connectivity, works wherever there is cellular coverage, and is what most operations rely on today for instant alerts.
LoRaWAN is a long-range (2+ km), low-power technology suited to remote areas. It is slow (small data packets), but soil data doesn’t need high bandwidth. It is available as a modular add-on that compatible controllers can be ready for, rather than a default shipping option.
Mesh networking lets controllers relay data through each other, extending range across large properties without cellular coverage.
Power and Durability
Agricultural controllers must survive harsh field conditions:
- Solar + battery power for off-grid locations (dual 18650 batteries with 10W+ solar panel is the sweet spot)
- IP65 minimum weather protection (IP67 is better)
- -20°C to 60°C operating temperature range
- UV-resistant enclosure for direct sun exposure
More details on selecting the right controller in our IoT controller buying guide.
Cloud Platform: Turning Data Into Decisions
Raw sensor data is useless without a platform to visualize it, set alerts, and track trends.
Essential Platform Features
- Real-time dashboard showing current soil conditions across all sensor stations
- Threshold alerts via SMS, email, or push notification (e.g., “Field 3 moisture dropped below 25 cb”)
- Historical charts for tracking seasonal patterns and comparing year-over-year performance
- Data export (CSV, PDF) for agronomist consultations and record-keeping
- Multi-depth visualization showing moisture, EC, and temperature profiles at different soil depths
- Mobile access for checking conditions from anywhere
Advanced Capabilities
- Automated irrigation triggers based on soil moisture thresholds
- API integration with existing farm management software
- Multi-site management for operations with multiple properties
- Zone mapping to visualize soil variability across fields
System Sizing: How Many Sensors Do You Need?
This is the most common question I get, and the answer depends on your soil variability and crop value.
Rules of Thumb
| Farm Type | Sensor Stations per Acre | Typical Setup |
|---|---|---|
| Uniform row crops | 1 per 2-5 acres | Moisture + temperature at 2 depths |
| Variable soil types | 1 per 1-2 acres | Moisture + EC + temperature at 2-3 depths |
| Orchards/vineyards | 1 per 1-3 acres | Tensiometers at 3 depths + temperature |
| Greenhouses | 1 per zone | Moisture + EC + pH + temperature |
| High-value specialty | 1 per 0.5-1 acre | Full sensor suite at multiple depths |
Each sensor station typically connects 3-6 individual sensors to one controller. A 20-acre vegetable operation might need 5-8 controllers with 20-40 total sensors.
Start Small, Expand Based on Data
My strongest recommendation: don’t try to instrument your entire operation at once. Start with 2-3 sensor stations in representative field zones. Run them for one growing season. Use the data to identify where additional monitoring would add the most value, then expand.
Every grower I’ve worked with who started with full coverage spent money on sensors in locations that didn’t need them. The ones who started small and expanded strategically got better ROI and better data.
Installation Best Practices
Sensor Placement
- Representative locations - not the easiest spot, but the spot that represents typical field conditions
- Multiple depths - minimum 6” and 12” for shallow crops, add 24”+ for deep-rooted crops
- Away from edges - field borders have different conditions than the interior
- Wait after tilling - let soil settle 2-3 weeks before installing sensors
- Mark locations clearly - nothing ruins sensor data like accidentally running over a probe
Controller Mounting
- 1-1.5m above ground on a sturdy post
- Solar panel facing south (in the Northern Hemisphere) at a 30-45° angle
- Away from sprinkler throw to avoid water damage to connectors
- Cable strain relief on all sensor connections
Cost and ROI
The cost of an IoT soil monitoring system is driven by a few factors: how many sensor stations you deploy, which sensor types you choose (moisture, temperature, EC, pH), the controller and its connectivity, and whether you add a cloud platform tier. Temperature probes are the lowest-cost component; EC and multi-parameter sensors sit higher. Wiring and installation also vary with field layout. The practical takeaway is that you can start small with moisture and temperature at a few stations, then expand as the data justifies it, so the system scales with your operation rather than demanding a large upfront commitment.
Expected returns:
- 20-40% water savings from precision irrigation
- 20-30% yield improvement from optimized growing conditions
- 15-25% fertilizer savings from EC-guided application
- ROI within 1-2 growing seasons for most operations
The math is straightforward: the savings in water, fertilizer, and prevented crop losses typically recover the system cost within one to two seasons, which makes a properly sized deployment an investment rather than an expense. For a quote tailored to your acreage and crop, contact our team.
Getting Started
If you’re ready to build your IoT soil monitoring system, here’s the path I recommend:
- Define your goals - Are you primarily saving water? Optimizing nutrients? Preventing crop stress? This determines which sensors to prioritize.
- Start with a pilot - Deploy 2-3 sensor stations in your most important field zone. Our soil monitoring solution includes everything you need.
- Run for one season - Collect data, learn your soil patterns, set baseline thresholds.
- Expand strategically - Add stations where the data shows variability or where problems occurred.
- Automate gradually - Start with alerts, then move to automated irrigation triggers as you build confidence in the data.
Have questions about which sensors and controllers are right for your operation? Contact our team for a free consultation, or explore our complete soil sensor catalog and IoT controllers.
Frequently Asked Questions
How do you use sensors for soil monitoring?
You use soil sensors in five steps: pick the right sensor types for what you need to measure (moisture, temperature, EC, or pH), install them at multiple depths in the root zone, wire them into a field IoT controller, connect the controller to a cloud platform via cellular, and set threshold alerts so you act on the data. Most farms see 20-40% water savings in the first season.
How much does an IoT soil monitoring system cost?
Cost depends on how many sensors you deploy, which parameters you measure, and how many zones you cover. A basic system with 2-3 soil moisture sensors and one IoT controller is a modest, right-sized starting investment. A full precision agriculture setup with moisture, EC, pH, and temperature sensors across multiple zones costs more, scaling with the number of stations. Ongoing cellular connectivity carries a modest monthly fee per controller. Contact us for current pricing.
Which soil sensors do I need for my farm?
At minimum, install soil moisture sensors at 2-3 depths in your root zone. For most crops, add soil temperature sensors. If you fertigate, add EC (conductivity) sensors to track salt levels. Soil pH sensors are valuable for crops sensitive to acidity. Soil tension sensors (tensiometers or granular matrix) are ideal for irrigation scheduling.
How much water can IoT soil monitoring save?
Most farms see 20-40% water savings in the first season by eliminating over-irrigation. The exact savings depend on your current irrigation method, crop type, and soil variability. Farms switching from fixed-schedule irrigation to sensor-based scheduling typically see the largest improvements.
What connectivity options work best for farm soil monitoring?
Cellular (4G/LTE) is the proven default for remote sites without local infrastructure, and it is what most field deployments rely on today. Wi-Fi is fine for greenhouses or small plots near buildings. LoRaWAN is a low-power, long-range option (one gateway covers 2-10 km) that modular controllers can be ready for as a future add-on for large farms without cellular coverage.
How deep should I install soil sensors?
Install sensors at multiple depths within and below the root zone. For most field crops, place sensors at 15 cm, 30 cm, and 60 cm depth. For orchards and deep-rooted crops, add sensors at 90-120 cm. The shallow sensor guides irrigation timing, the middle sensor confirms water is reaching roots, and the deep sensor catches over-irrigation.
Looking for a tensiometer for your plot? Compare the Agrinovo tensiometer range by your crop’s root-zone depth and request a tailored quote.
Monitoring fertigation too? See the EC sensors for agriculture and irrigation: continuous monitoring of the nutrient solution, source water, and drainage.