A farmer in the Negev called us last year, frustrated to the point of wanting to rip every sensor out of his tomato fields and go back to the shovel-and-feel method. He had installed 16 capacitance soil moisture sensors across four drip-irrigated blocks, and every block was giving him different numbers that did not match what he saw when he actually dug into the soil. Block A read 42% volumetric water content but the soil at sensor depth felt dry and crumbly. Block C read 18% but the soil was clearly moist. He had been irrigating based on these numbers for six weeks and his tomato plants were showing both overwatering symptoms (in Block A) and drought stress (in Block C) at the same time.
The problem was not the sensors. The sensors were measuring exactly what they were designed to measure. The problem was that he had installed them wrong, was reading the numbers without accounting for his soil type, and was using the factory calibration on three different soil textures ranging from sandy loam to heavy clay.
This is the most common situation we encounter with soil moisture monitoring. The technology works. The physics is sound. But somewhere between the manufacturer’s specification sheet and the reality of a farmer’s field, things go wrong. Sensors get installed with air gaps. Readings get interpreted without soil-specific calibration. The wrong sensor type gets chosen for the soil conditions. And the farmer concludes that “sensors do not work” when the real problem is entirely fixable.
This guide covers every common reason soil moisture sensors give wrong or confusing readings, how to fix each one, and when the right answer is to switch to a different sensor technology entirely. If you are still choosing between sensor types, start with our soil sensors explained guide and come back here when you have hardware in the ground.
Problem 1: Air Gaps Around the Sensor
This is the single most common cause of bad soil moisture readings, and it affects every sensor type: capacitance, TDR, FDR, tensiometers, and granular matrix sensors.
Why air gaps matter
Every soil moisture sensor works by measuring some property of the soil immediately surrounding the sensor body. Capacitance sensors measure the dielectric properties of the soil-water matrix. Tensiometers measure the suction pressure through a porous ceramic tip. If there is an air gap between the sensor and the surrounding soil, the sensor is measuring air, not soil. Since air has a dielectric constant of 1 (versus 80 for water and 4-8 for dry soil minerals), even a 2-3 mm air gap can cause a capacitance sensor to read 10-20% lower than actual soil moisture.
How air gaps form
- Poor installation. Dropping a sensor into an augered hole without packing soil around it.
- Soil shrink-swell. Clay soils expand when wet and contract when dry. The sensor body stays the same size. During dry periods, the clay pulls away from the sensor, creating a gap that fills with air. When it rains, the clay swells back and the gap closes, causing wild swings in readings.
- Root growth and insect activity. Roots grow along sensor cables and create channels. Burrowing insects create voids.
- Freeze-thaw cycles. In cold climates, repeated freezing and thawing heaves the soil around the sensor and creates gaps.
How to fix it
For new installations:
- Auger a hole slightly larger than the sensor body
- Mix native soil with water to create a thick slurry (the consistency of thick pancake batter)
- Pour slurry into the hole, insert the sensor, and let the slurry fill all voids
- Pack gently but do not compress the soil, which would change its density and moisture characteristics
- Wait 2-3 wetting/drying cycles before trusting readings
For existing sensors showing air gap symptoms:
- Carefully excavate around the sensor
- Repack with native soil slurry
- For clay soils that crack, consider switching to a sensor with a larger measurement volume (TDR probes with 15-20 cm rods are less affected by local gaps than compact capacitance sensors)
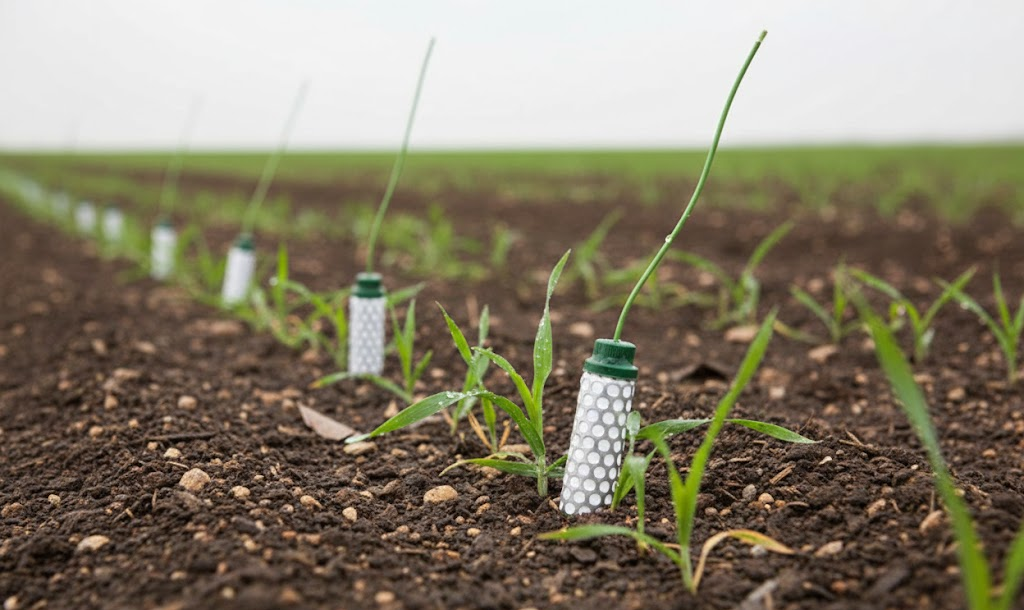
Problem 2: Wrong Depth or Wrong Location
Depth matters more than most people think
We have seen farmers install sensors at 10 cm depth in a crop with roots at 40 cm, then wonder why the plants are stressed even though the sensor says the soil is moist. The top 10 cm dries out and rewets with every irrigation cycle, but the active root zone at 30-40 cm may be bone dry.
Install sensors at multiple depths within the root zone:
- Shallow sensor (15-20 cm): Triggers irrigation start. This is the first zone to dry out.
- Mid-depth sensor (30-50 cm): Confirms water is reaching the main root zone. If this sensor does not respond within a few hours of irrigation, your application rate or duration is insufficient.
- Deep sensor (60-90 cm): Detects over-irrigation. If this sensor shows consistent wetting, you are pushing water past the root zone and wasting it.
Location within the field
Soil varies across even small fields. Install sensors in spots representative of the overall field, not in the wettest or driest corners. Avoid:
- Low spots where water pools after rain
- High spots that drain faster than average
- Within 1 meter of drip emitters (readings will cycle wildly with irrigation)
- Near field edges where compaction from equipment is different
- Under tree canopy if monitoring open-field crops
For drip irrigation, place sensors 15-20 cm laterally from the emitter, within the wetted bulb but not directly under the drip point. This gives you the moisture level that the majority of the root zone is experiencing.
Problem 3: Using Factory Calibration on the Wrong Soil
This is the most technically insidious problem because the sensor reads correctly according to its own calibration, but the numbers do not mean what you think they mean.
How calibration works
Capacitance and FDR sensors ship with a “factory calibration” that converts the sensor’s raw electrical reading into volumetric water content (expressed as a percentage). This calibration is typically done in standard loam or a reference substrate.
The problem is that soil dielectric properties vary enormously by texture. Sandy soil, loam, and clay have different relationships between water content and dielectric permittivity. A factory calibration that is accurate in loam can be off by 5-15% in heavy clay or coarse sand.
When does this matter?
If you are using soil moisture sensors for relative comparison (is the soil wetter or drier than yesterday?), factory calibration is usually adequate. The trend is correct even if the absolute number is off.
If you are using sensors for absolute irrigation scheduling (irrigate when volumetric water content drops below 22%), factory calibration can lead to significant over- or under-irrigation.
How to fix it
Option 1: Soil-specific calibration. Collect gravimetric soil samples at multiple moisture levels alongside sensor readings. Plot sensor readings versus actual water content (determined by weighing, oven-drying at 105 degrees C for 24 hours, and reweighing). Derive a calibration equation specific to your soil. This is the gold standard but requires lab work.
Option 2: Switch to tension-based sensors. Tensiometers and granular matrix sensors like the Watermark 200SS measure soil water tension (suction), not volumetric water content. Tension is directly related to plant-available water regardless of soil type. A reading of 30 kPa means the same thing in sandy soil as it does in clay: the soil is holding water at 30 kPa of suction, and you can look up whether that is wet or dry for your crop. This sidesteps the calibration problem entirely. For more on how granular matrix sensors work, read our granular matrix sensor guide.
Option 3: Use manufacturer-provided soil-type curves. Some sensor manufacturers provide calibration curves for sand, loam, and clay. Check your sensor manual. Using the clay curve instead of the default loam curve can reduce error from 15% to 3-5%.
Problem 4: Temperature Effects
Soil temperature changes dielectric properties. A capacitance sensor in soil at 5 degrees C will read differently than the same sensor in the same soil at 35 degrees C, even if actual moisture has not changed. The magnitude of this error varies by sensor design but can be 2-5% volumetric water content.
How to identify temperature effects
If your soil moisture readings show a daily cycle (lower in the cool morning, higher in warm afternoon) that mirrors the temperature pattern, you are seeing temperature interference. This is especially pronounced in surface sensors (top 10 cm) where temperature swings are largest.
How to fix it
- Use sensors with built-in temperature compensation. Many modern capacitance sensors have a temperature sensor that corrects readings automatically.
- Add a separate soil temperature sensor (like the DS18B20 probe) alongside your moisture sensor and apply correction in your data logger or software.
- Install sensors deeper (below 20 cm) where temperature swings are smaller.
- Tensiometers and Watermark sensors are inherently less sensitive to temperature than capacitance sensors, though some correction is still advisable for precision work.
Problem 5: Salinity Interference
If you irrigate with water that has EC above 2 dS/m, or if your soil has naturally high salt content, capacitance and FDR sensors will overread. They detect the electrical conductivity of dissolved salts and interpret it as water. A capacitance sensor in saline soil at 25% actual moisture may read 35-40%.
How to identify salinity interference
If readings are consistently higher than what you observe by feel or by gravimetric sampling, and you know your water or soil has elevated EC, salinity is the likely culprit.
How to fix it
- Use sensors specifically designed for saline conditions (some TDR sensors can separate the water signal from the conductivity signal)
- Switch to tension-based sensors. Tensiometers and Watermark sensors are not affected by salinity below about 6 dS/m, and corrections are available for higher levels
- If you must use capacitance sensors, add a soil EC sensor to the same location and apply a salinity correction to the moisture readings. Our soil sensors guide covers EC monitoring in detail.
Problem 6: Reading the Wrong Units
This sounds too simple to be a real problem, but we encounter it regularly.
- Volumetric water content (VWC) is expressed as a percentage (0-100%) or a decimal (0-1.0). It means the volume of water per volume of soil.
- Soil water tension (or soil matric potential) is expressed in kPa, centibars, or bars. It represents how tightly the soil holds water. Higher numbers mean drier soil (the opposite of what people expect).
- Some sensors output raw counts or millivolts that need to be converted using a calibration equation.
We have seen farmers interpret Watermark tension readings (where 0 = saturated and 200 = bone dry) as if they were moisture percentage readings (where 0 = dry and 100 = wet). They irrigated when readings were low (thinking the soil was dry) when low readings actually meant saturated.
Always check what units your sensor reports and what direction the scale goes.
When to Switch Sensor Technologies
Sometimes the fix is not recalibrating or reinstalling your existing sensors. Sometimes you have the wrong sensor type for your conditions.
Use tensiometers when:
- You need accurate readings in the wet range (0-80 kPa)
- You farm on heavy clay that causes air gap problems with compact sensors
- You irrigate frequently and need to know when to stop as much as when to start
- You farm high-value crops (citrus, avocado, grapes) where over-irrigation wastes water and damages roots
The LT tensiometer is a standard laboratory-grade option. The MLT tensiometer is designed for long-term field deployment. The SR tensiometer is a shorter version for shallow root zones. For a full comparison, see our tensiometer guide.
Use granular matrix sensors (Watermark) when:
- You need a sensor that works across the full range (0-200 kPa) without maintenance
- You want a low-maintenance alternative to tensiometers without sacrificing accuracy
- You farm in conditions where tensiometers would cavitate frequently (hot, dry climates where tension exceeds 80 kPa)
- You need multiple sensors per field and want a proven, field-hardened technology
The Watermark 200SS is the industry standard granular matrix sensor. For how it works and when it outperforms other technologies, see our granular matrix sensor guide.
Use capacitance/FDR sensors when:
- You are on sandy or loamy soils with low salinity
- You need very fast response time (seconds versus minutes)
- You are monitoring soil moisture for research or environmental purposes where relative change matters more than absolute accuracy
- You have done soil-specific calibration
Use TDR sensors when:
- You need the highest accuracy volumetric water content measurement
- You are willing to pay more per sensor point
- You farm on variable soils and need a technology that is less sensitive to soil type
Connecting Sensors to a Monitoring System
A soil moisture sensor buried in a field and connected to nothing is just data waiting to be lost. For the readings to actually improve your irrigation, you need the sensor data reaching you in real time.
For a complete guide to building a soil monitoring system with controllers, data logging, and remote access, read our IoT soil monitoring system guide. The Omni Genesis Lite controller is a good starting point for soil monitoring because it supports multiple sensor inputs over SDI-12, reads at configurable intervals, and transmits data over cellular to your phone or dashboard.
The Troubleshooting Checklist
Before you call your sensor wrong, run through this checklist:
- Air gaps? Dig carefully next to the sensor and look for voids. Repack with soil slurry if found.
- Right depth? Confirm the sensor is in the active root zone, not above or below it.
- Right location? Not in a low spot, high spot, or directly under a drip emitter.
- Right calibration? Are you using a soil-specific calibration or factory default? What soil type did the factory calibration assume?
- Right units? VWC vs tension vs raw counts. Which direction does the scale go?
- Temperature effects? Do readings cycle with daily temperature? Check for temperature compensation.
- Salinity interference? What is the EC of your irrigation water and soil? Above 2 dS/m, capacitance sensors need correction.
- Sensor age? Electronics drift over years. Compare against a fresh sensor or gravimetric sample.
- Wiring and connections? Corroded connectors and damaged cables cause erratic readings. Check all connections.
- Is the datalogger configured correctly? Wrong excitation voltage, wrong channel, wrong conversion equation.
Fix these ten things and 95% of soil moisture sensor problems disappear. The remaining 5% are genuine hardware failures, and replacing the sensor solves those.