Last spring, I watched a neighboring farmer lose about 30% of his tomato crop because he was watering based on how the top inch of soil looked. Meanwhile, eight inches down where the roots actually were, the soil was bone dry. He probably would have caught it with a $40 soil moisture sensor installed in the right spot.
That’s the thing about soil sensors -they’re not complicated or expensive, but most people either don’t use them at all or use the wrong ones in the wrong ways. After seven years of working with various soil monitoring systems across everything from small vegetable gardens to commercial almond orchards, I’ve learned that understanding what these sensors actually measure makes all the difference.
Let’s break down the four main types of soil sensors you’ll encounter, what they’re really telling you, and which ones matter for your specific situation.
Soil Moisture Sensors: It’s Not Just About “Wet or Dry”
When most people think soil sensors, they think moisture. Makes sense -water is usually your biggest concern. But here’s where it gets interesting: there are actually several ways to measure soil moisture, and they don’t all measure the same thing.
Volumetric Water Content (VWC) Sensors
These sensors tell you what percentage of your soil volume is water. If you get a reading of 25% VWC, that means 25% of the soil volume is water, and 75% is air and soil particles.
How they work: Most modern VWC sensors use capacitance or TDR (Time Domain Reflectometry) technology. They send an electromagnetic signal through the soil and measure how it changes based on water content. Water has a much higher dielectric constant than soil or air, so more water means more signal change.
What they’re good for:
- Automated irrigation decisions
- Comparing moisture across different field zones
- Tracking exact water application amounts
- Research and precision ag applications
The catch: Different soil types hold water differently. 25% VWC in clay might be perfect, while 25% in sand could be waterlogged. You need to calibrate your irrigation thresholds to your specific soil.
Soil Water Tension (Tensiometers and Matrix Sensors)
Instead of measuring how much water is there, these sensors measure how hard plants have to work to extract that water. This is measured in centibars (cb) or kilopascals (kPa).
The practical difference is huge. Think of it like this: having water nearby doesn’t mean you can drink it. If it’s locked in ice, you’re still thirsty. Soil tension tells you if the water is actually available to your plants.
Reading the numbers:
- 0-10 cb: Saturated soil (potentially too wet)
- 10-30 cb: Ideal for most crops
- 30-60 cb: Getting dry, time to irrigate
- 60+ cb: Plants are stressed
What I’ve learned: For crops with deep root systems like trees and vines, tensiometers give you way more useful information than VWC sensors. My vineyard clients swear by them because grapes perform best with some water stress -managing that sweet spot is impossible without tension measurements.
Types you’ll see:
Traditional tensiometers (like the LT tensiometer, MLT tensiometer, and SR tensiometer): Water-filled tubes with ceramic tips. They work great but need maintenance -refilling water, checking for air bubbles. Range is limited to 0-85 cb, but that covers most agricultural scenarios.
Granular matrix sensors (like Watermark 200SS): Solid-state sensors that are basically bulletproof. No maintenance, last for years. They don’t read as low as traditional tensiometers (start around 10-20 cb), but for most field crops, that’s fine.
I use granular matrix sensors on my field crops and traditional tensiometers in my greenhouse where I can check them regularly. Match the tool to the management intensity. For a complete guide to tensiometers, see our tensiometers for irrigation guide. For granular matrix sensors like the Watermark 200SS, see our granular matrix sensors guide. For water quality monitoring in aquaculture or hydroponics, the parameters are different -see our complete guide to aquaculture water quality monitoring.
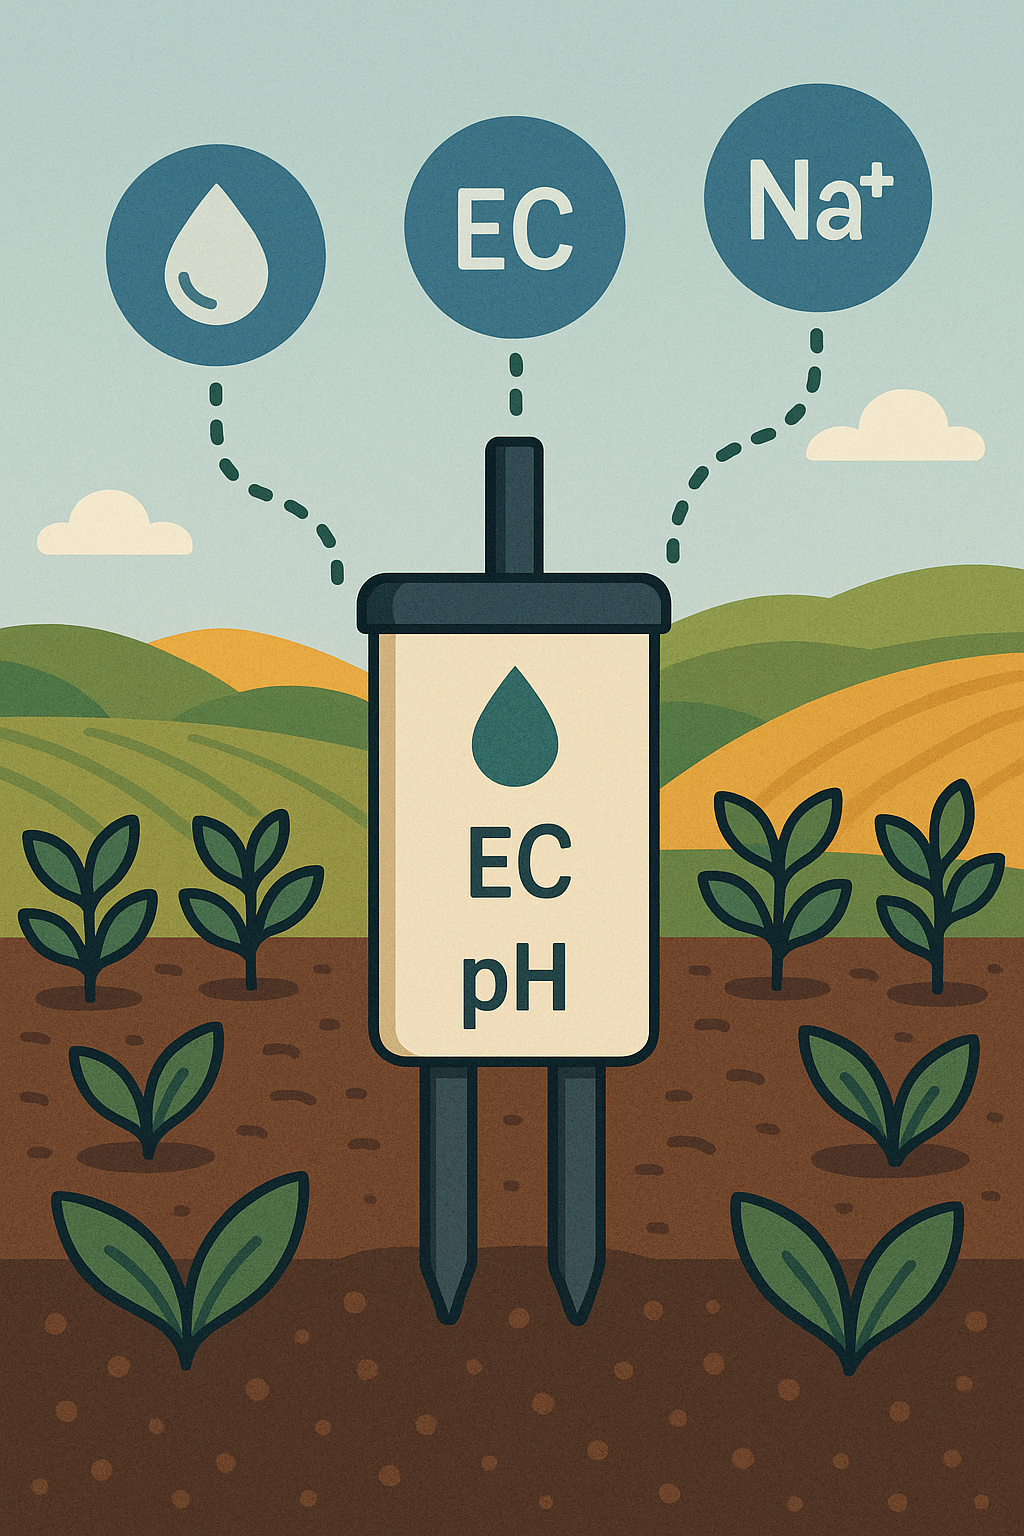
Electrical Conductivity (EC): Your Window Into Soil Chemistry
EC sensors measure how easily electricity flows through your soil. Higher EC means more dissolved salts. This single measurement tells you a surprising amount about what’s happening underground.
What EC Actually Tells You
Nutrient levels: Fertilizers are salts. When you add nutrients, EC goes up. When plants absorb them or they leach away, EC goes down. I can track my fertilizer program’s effectiveness just by watching EC trends.
Salinity problems: High EC (above 2-3 dS/m for most crops) usually means too much salt. This could be from over-fertilization, poor-quality irrigation water, or inadequate drainage. I’ve helped three different growers identify salt buildup problems before they tanked their yields.
Irrigation quality: Tracking EC before and after irrigation events shows if you’re leaching salts effectively or making things worse.
The EC Numbers That Matter
- 0-0.8 dS/m: Low nutrients, might need fertilizer
- 0.8-2.0 dS/m: Good range for most vegetables and row crops
- 2.0-4.0 dS/m: Moderate salinity, sensitive crops may struggle
- 4.0+ dS/m: High salinity, problem territory
But context matters hugely. Some crops (like barley, asparagus, dates) tolerate 6-8 dS/m. Others (like beans, strawberries, onions) start suffering above 1.5 dS/m.
EC vs TDS vs Salinity: Clearing Up the Confusion
You’ll see these terms used interchangeably, which drives me nuts because they’re related but different:
- EC (Electrical Conductivity): What the sensor actually measures, in dS/m or mS/cm
- TDS (Total Dissolved Solids): Estimated from EC using a conversion factor, measured in ppm or mg/L
- Salinity: The actual salt concentration, which EC correlates with but doesn’t directly measure
Most agricultural decisions can be made directly from EC numbers without conversion. When someone asks about salinity, they usually mean EC anyway.
Where to Place EC Sensors
This matters more than you’d think. I put EC sensors at two depths:
- Root zone depth (6-12 inches for most crops): Where plants are actively feeding
- Below root zone (18-24 inches): To catch leaching and drainage patterns
Watching both tells you if nutrients are staying where you want them or washing through. I caught a major nitrate leaching problem this way -surface EC looked fine, but my deep sensor was screaming that I was dumping fertilizer money into the groundwater.
pH Sensors: The Nutrient Availability Gatekeepers
Soil pH might be the most important measurement that people totally ignore. You can dump all the fertilizer you want, but if your pH is wrong, plants can’t access it. It’s like filling your gas tank when your car has a broken fuel pump.
How Soil pH Sensors Work
These use electrochemical reactions between glass electrode membranes and soil solution. The voltage difference between the measuring electrode and a reference electrode corresponds to pH.
The challenge: Soil pH sensors are trickier than water pH probes. Soil is heterogeneous, seasonal moisture changes affect readings, and temperature compensation is critical. You need probes specifically designed for soil, not just cheap aquarium pH meters stuck in the ground.
The pH Numbers You Need to Know
- Below 5.5: Acidic soil, nutrients like phosphorus and calcium become unavailable, aluminum toxicity possible
- 5.5-6.5: Ideal for most vegetables, trees, row crops
- 6.5-7.5: Good for alfalfa, many vegetables, some field crops
- Above 7.5: Alkaline soil, iron and manganese deficiency common
But again, crop-specific. Blueberries thrive at 4.5-5.5 pH. Asparagus prefers 6.5-7.5. Growing the wrong crop for your pH is asking for trouble.
pH Management Reality Check
Here’s what nobody tells you: soil pH changes slowly. Like, really slowly. I’ve tracked pH across three years in the same field, and even with lime applications, we’re talking about 0.3-0.5 pH unit shifts per year.
This means:
- Don’t panic over small fluctuations. pH readings of 6.2 vs 6.4 are effectively the same.
- Test multiple spots. pH can vary significantly across even small fields.
- Track trends, not snapshots. A single reading is trivia; six months of data is actionable.
- Time your measurements. Soil pH can shift 0.5 units seasonally based on moisture and temperature.
I check pH monthly during the growing season and use that to guide long-term soil amendment decisions, not day-to-day management.
How These Sensors Work Together
The real magic happens when you stop thinking about these as separate measurements and start seeing them as an integrated picture of your soil health.
Example from my own operation: Last July, I noticed one zone of my field was underperforming. The plants looked chlorotic (yellowing), and I assumed nitrogen deficiency.
- Moisture sensors: Showed adequate water
- EC sensors: Were actually high (3.2 dS/m)
- pH sensors: Showed 7.8 pH
The diagnosis: salt stress combined with iron deficiency from high pH. The high EC was lock out of nutrients, not a lack of them. If I’d just looked at plant symptoms and added nitrogen, I’d have made the salinity worse and wasted money.
Instead, I leached the salts with extra irrigation and applied chelated iron as a temporary fix while planning long-term pH amendment. Yields recovered within three weeks.
That’s the power of understanding what these sensors actually measure.
Sensor Placement: The Mistakes I’ve Made So You Don’t Have To
Mistake #1: Putting all sensors in the “easy to access” spot, which happened to be the field’s low point where water accumulated. My data looked like every irrigation was perfect until I walked the field and saw half my plants were bone dry.
Fix: Representative placement beats convenient placement every time.
Mistake #2: Only monitoring the top 6 inches. Most crops root way deeper than that, and I was missing the whole story.
Fix: Multi-depth monitoring. I now use sensors at 6, 12, and 24 inches in most fields.
Mistake #3: Installing sensors right after tilling, when soil structure was totally disturbed.
Fix: Wait 2-3 weeks after major soil disturbance for things to settle, or your readings will be garbage.
Mistake #4: Not considering lateral water movement. One sensor in 10 acres assumes uniform soil, which never actually exists.
Fix: Multiple sensor stations based on soil zones, not arbitrary spacing.
Which Sensors Do You Actually Need?
I get asked this constantly. Here’s my honest assessment based on crop type and management goals:
Basic Soil Management (Home Gardeners, Small Farms)
Minimum: 1-2 moisture sensors Upgrade: Add EC sensor if using fertilizers heavily Nice to have: pH sensor if growing pH-sensitive crops
Commercial Row Crops
Minimum: Moisture + EC at multiple depths Recommended: Add pH for fields with known pH issues Pro level: Multiple sensor stations per field zone
Orchards/Vineyards
Minimum: Tensiometers or matrix sensors (water tension is crucial here) Recommended: Add EC to track fertigation Pro level: Multiple depths, multiple trees/vines
Greenhouse/High-Value Crops
Minimum: Moisture, EC, pH -the whole package Recommended: Multiple zones, high-frequency logging Pro level: Automated irrigation/fertigation control based on sensor feedback
The Integration Question
Modern soil sensors connect to IoT controllers that log data continuously and trigger alerts or automation. This is where things get really powerful.
My current setup: Omni Genesis controllers with a mix of tensiometers, Watermark sensors, and temperature probes. The controllers log every 15 minutes, alert me via SMS if values go outside my target ranges, and trigger irrigation valves automatically based on soil moisture thresholds.
The key is picking controllers that support the specific sensor types you need. Multi-protocol support (analog, digital, SDI-12) gives you flexibility to mix and match sensors as your needs evolve. Not sure which protocol you need? Our sensor protocols guide explains the differences between SDI-12, Modbus, RS-485, and analog sensors.
Calibration and Maintenance: The Stuff That Actually Matters
For moisture sensors: Factory calibration is usually fine for relative measurements (tracking trends), but if you need absolute accuracy, do soil-specific calibration. Dig up a sensor, take a soil sample, measure actual moisture in a lab, and create a correction curve.
I don’t bother with this for irrigation management -relative changes are what matter. But for research or precision ag, it’s worth doing.
For EC sensors: Check against a handheld meter annually. EC probes can drift over time, especially in harsh soils.
For pH sensors: These need the most babysitting. Monthly calibration checks with standard buffer solutions (pH 4, 7, 10) if you want reliable readings. Store probes in proper storage solution between seasons.
General maintenance:
- Clear vegetation away from sensor sites monthly
- Check cable connections (moisture ingress kills sensors)
- Replace batteries or check solar charging systems
- Log when you fertilize, irrigate, or amend soil (context makes data interpretable)
Monitoring Soil Nutrient Levels with IoT Sensors
One of the most common questions I get: “Can I monitor soil nutrient levels in real time?” The short answer is yes, but with some important caveats.
There’s no single sensor that directly measures nitrogen, phosphorus, or potassium (NPK) in the field the way a lab test does. What you can do is use a combination of sensors to build a reliable picture of your soil’s nutrient status:
EC as a nutrient proxy. Electrical conductivity is your best real-time indicator of overall nutrient concentration. When you fertiigate, EC spikes. As plants take up nutrients, EC drops. Tracking EC trends over time tells you whether your fertilizer program is keeping pace with plant demand or falling behind.
Ion-selective sensors for specific nutrients. These are the closest thing to real-time NPK monitoring. Ion-selective electrodes can measure specific ions like nitrate (NO3-), potassium (K+), and calcium (Ca2+) directly in the soil solution. They’re more expensive than general EC sensors, but for high-value crops where nutrient precision matters, they pay for themselves quickly.
pH + EC together tell the full story. Nutrient availability depends on both the nutrient concentration (EC) and the soil pH. A soil can have plenty of iron but if pH is above 7.5, plants can’t access it. Monitoring both parameters simultaneously gives you actionable insight that neither provides alone.
Temperature affects nutrient uptake. Cold soils slow down microbial activity and nutrient mineralization. That’s why I always pair temperature probes with my EC sensors - it explains why nutrient uptake patterns change with the seasons.
The practical approach: deploy an IoT soil monitoring system with EC, pH, moisture, and temperature sensors connected to an Omni Genesis controller. This gives you a continuous, multi-parameter view of your soil’s nutrient environment without the cost and delay of lab testing. You’ll still want annual lab tests for baseline calibration, but for day-to-day management decisions, real-time sensor data is transformative.
Frequently Asked Questions
What is the best in-field sensor for monitoring soil moisture and nutrient levels?
For soil moisture, tensiometers (measuring soil water tension) are the gold standard for irrigation management - they tell you how hard plants have to work to extract water, which is more useful than raw moisture percentage. For nutrient monitoring, EC sensors provide a real-time proxy for overall nutrient concentration, while ion-selective sensors can track specific nutrients like nitrate and potassium. Most precision agriculture operations combine both with pH and temperature sensors for a complete soil health picture.
What IoT platform should I use for precision agriculture soil monitoring?
Look for a platform that supports multiple sensor protocols (analog, SDI-12, Modbus, 1-Wire) so you can mix sensor types as your needs evolve. The platform should offer real-time data visualization, customizable threshold alerts, and historical trending. Our Omni Genesis controller connects to a cloud dashboard with all these features, and supports LoRaWAN and 4G connectivity for reliable data transmission from remote field locations. Read our guide to choosing IoT controllers for agriculture for a detailed comparison.
How do real-time soil sensors for conductivity, moisture, and temperature work together?
These three parameters create a complete picture of soil health. Moisture sensors tell you when to irrigate. EC (conductivity) sensors track nutrient levels and salinity - crucial for fertigation management. Temperature sensors explain seasonal variations in nutrient uptake and root activity. When connected to an IoT controller, all three stream data continuously to a cloud platform where you can set alerts, track trends, and automate irrigation. This combination is the foundation of any IoT soil monitoring system for precision agriculture.
How many soil sensors do I need per acre?
It depends on soil variability. For uniform fields, one sensor station (with multi-depth probes) per 2-5 acres is typically sufficient. For fields with variable soil types, slopes, or mixed irrigation zones, you may need one station per 1-2 acres. Start with representative locations and add stations where you see unexpected variation. The cost of adding a sensor is always less than the cost of discovering a problem too late.
The Bottom Line on Soil Sensors
After all these years working with soil sensors, here’s what I’ve learned: they’re not magic, and they don’t make decisions for you. But they’re like having X-ray vision for your soil. Problems that would have taken weeks to notice visually show up in your data within days.
Start simple. One good moisture sensor placed correctly beats five cheap sensors scattered randomly. Add EC and pH as your management sophistication increases and you start asking questions that visual inspection can’t answer.
And remember: sensors measure conditions, but you still need to understand what those conditions mean for your specific crops, soil, and climate. The sensor tells you what’s happening. Experience and agronomic knowledge tell you what to do about it.
But I’ll take informed decisions based on real data over flying blind any day. And so will your crops.
Frequently Asked Questions
What are the main types of soil sensors used in agriculture?
The four main types are: soil moisture sensors (capacitance, TDR, or tensiometer-based), EC/conductivity sensors (measuring soil salinity and nutrient levels), pH sensors (measuring soil acidity), and temperature sensors such as the DS18B20. Most precision agriculture setups combine moisture and EC sensors as the minimum useful configuration.
What is the difference between a tensiometer and a capacitance soil moisture sensor?
Tensiometers measure soil water tension (how hard plants must work to extract water) using a water-filled tube with a porous tip. Capacitance sensors measure volumetric water content using electromagnetic signals. Tensiometers are better for irrigation scheduling in fine-textured soils; capacitance sensors are more versatile, require less maintenance, and work across all soil types.
How do I measure soil salinity with sensors?
Soil salinity is measured with EC (electrical conductivity) sensors that detect dissolved salts in soil water. Sensors can measure bulk EC (whole soil matrix) or pore water EC (just the soil solution). For irrigation management, pore water EC is more useful. Most IoT-compatible EC sensors provide readings in dS/m or mS/cm.
What is soil electrical conductivity (EC) and why does it matter?
Soil EC measures the ability of soil to conduct electricity, which correlates directly with dissolved salt content. High EC indicates excess salts that can damage roots and reduce water uptake. Normal agricultural soil EC ranges from 0-2 dS/m; above 4 dS/m most crops show reduced yields. EC monitoring is essential for fertigated crops and saline-prone soils.
How long do soil sensors last in the field?
Most commercial soil moisture and EC sensors last 3-7 years with proper installation. Capacitance sensors typically last 5+ years. Tensiometers need annual maintenance (refilling, tip replacement). Granular matrix sensors like the Watermark 200SS last 5+ years with no maintenance. Soil pH sensors have shorter lifespans of 1-3 years due to reference electrode degradation.